

Hello!
Today I will show you two ways you can make your own kimono. (Hey Fran, remember last year when I said I would make a tutorial? It's a bit late but here it is!)
It's quite easy so if you want to learn how to sew but don't know where
to start, look no further. The first way is the easiest and fastest since it's
basically just a rectangle.
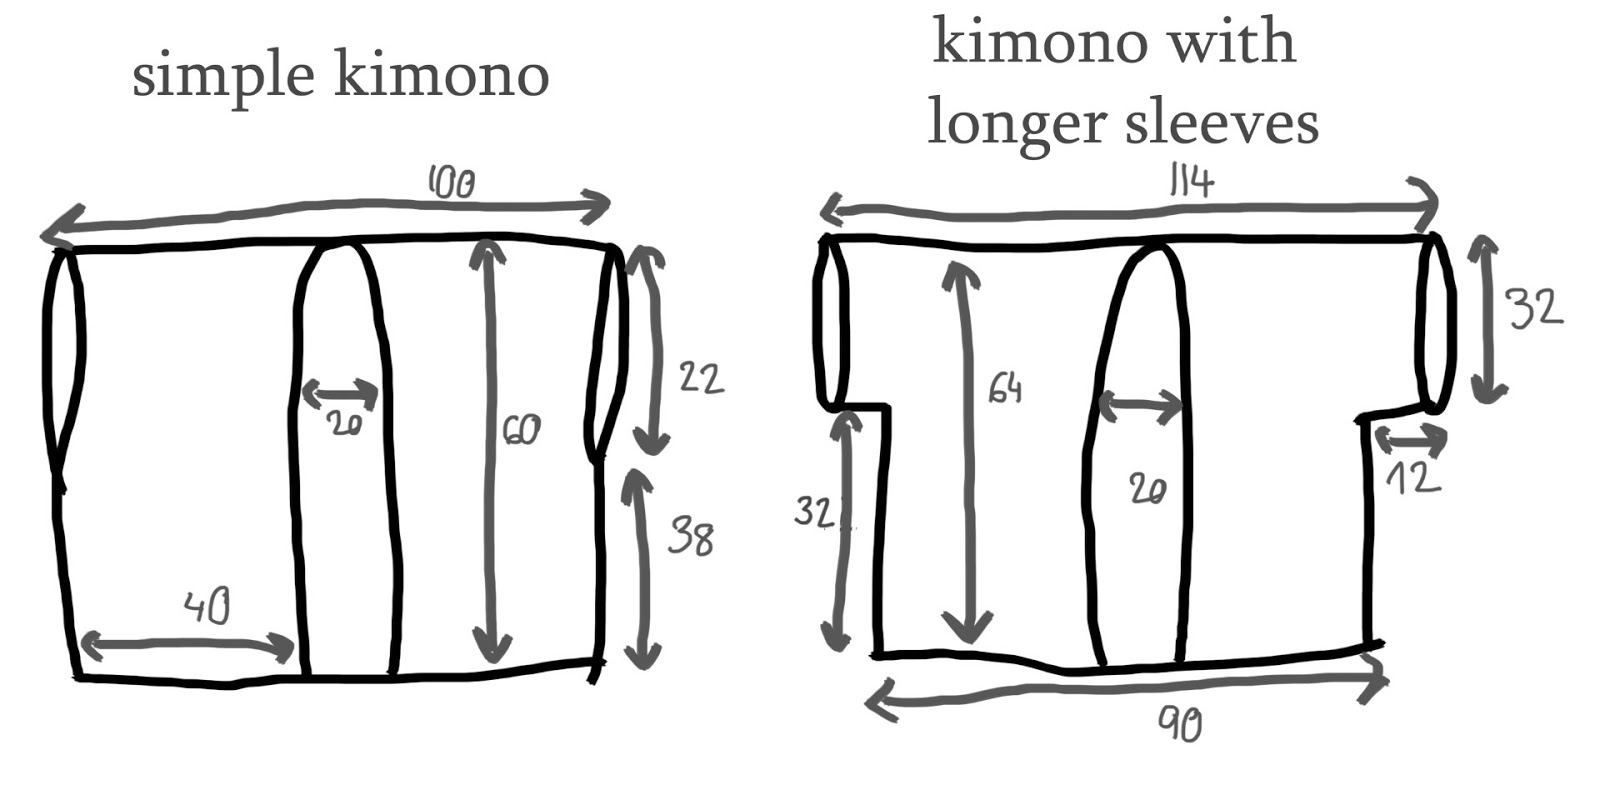
Simple kimono:
STEP 1- Fold and sew the borders of the sides to avoid fraying.
STEP 2- Sew sides together, with the right sides of the fabric facing each other. Don't forget the two opening for the arms.
STEP 3- Cut an opening/slit for the front opening of the kimono. Fold and sew the borders to avoid fraying.
STEP 4- Fold and sew the hem.
With longer sleeves:
STEP 1- Sew sides and bottom of sleeves together, with the right sides of the fabric facing each other.
STEP 2- Fold and sew the border of the sleeves.
STEP 3- Cut an opening/slit for the front opening of the kimono. Fold and sew the borders to avoid fraying.
STEP 4- Fold and sew the hem.
I really hope this tutorial is useful and understandable as I can be a bit vague when describing things. Please tell me if you want to make a kimono and don't understand one step.
Love, Elsa

This is a really cute post! Love DIYing things, I always feel so good about making something myself! Lydia Eve, www.mydaisychaincloset.blogspot.co.uk xx
ReplyDeleteThanks :) I agree, making stuff myself always makes me feel proud and happy.
Delete